Tiger Cloud: Performance, Scale, Enterprise, Free
Self-hosted products
MST
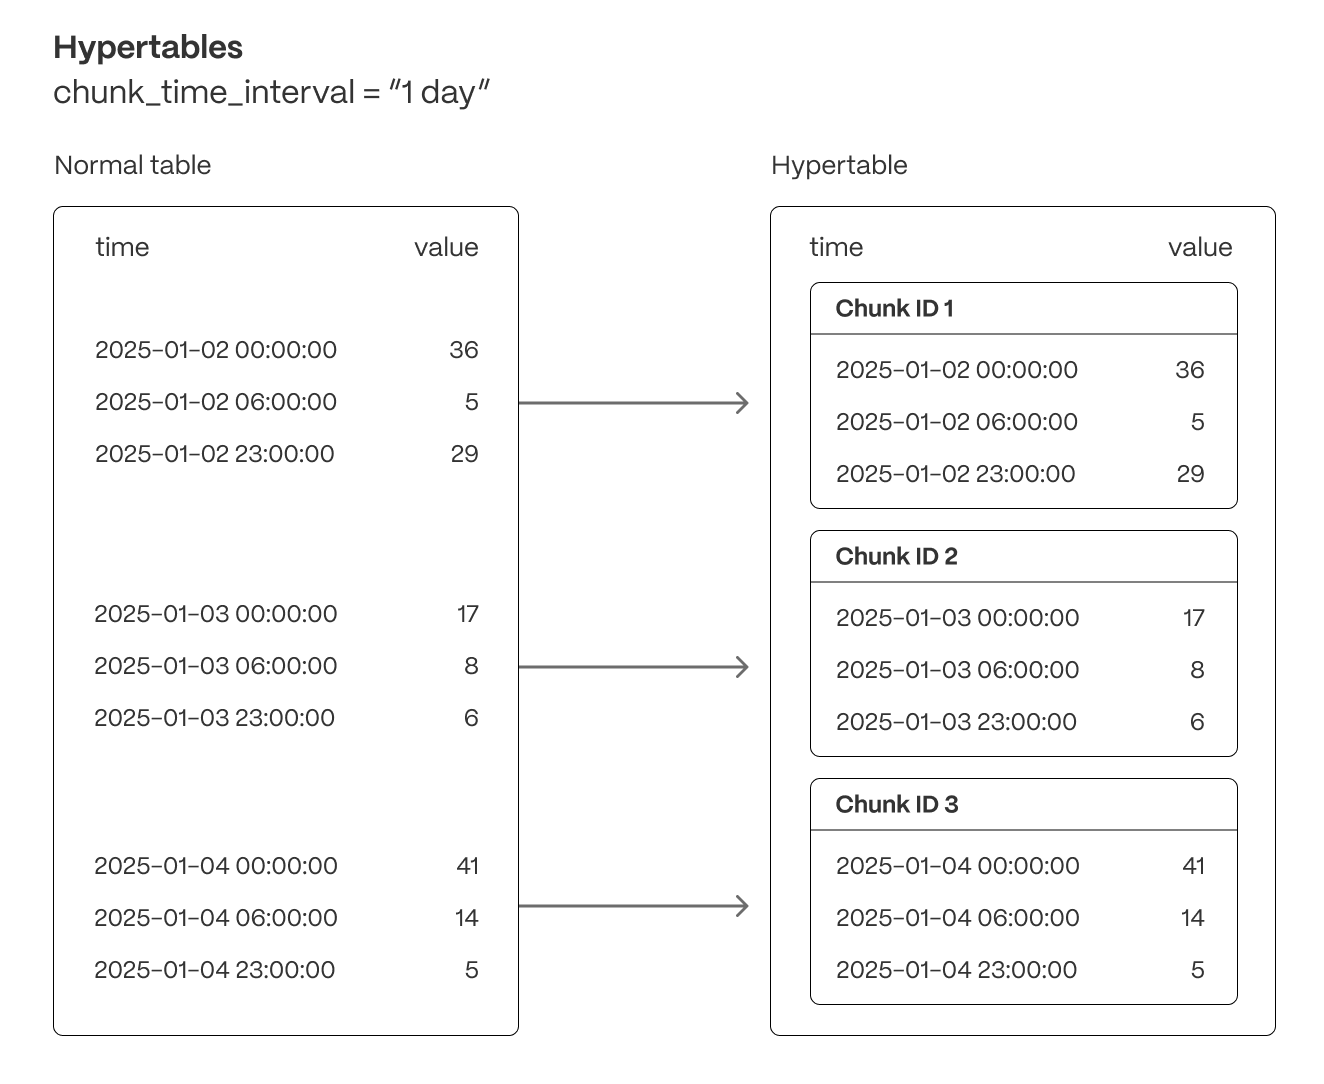
Tiger Cloud supercharges your real-time analytics by letting you run complex queries continuously, with near-zero latency. Under the hood, this is achieved by using hypertables—Postgres tables that automatically partition your time-series data by time and optionally by other dimensions. When you run a query, Tiger Cloud identifies the correct partition, called chunk, and runs the query on it, instead of going through the entire table.

Hypertables offer the following benefits:
Efficient data management with automated partitioning by time: Tiger Cloud splits your data into chunks that hold data from a specific time range. For example, one day or one week. You can configure this range to better suit your needs.
Better performance with strategic indexing: an index on time in the descending order is automatically created when you create a hypertable. More indexes are created on the chunk level, to optimize performance. You can create additional indexes, including unique indexes, on the columns you need.
Faster queries with chunk skipping: Tiger Cloud skips the chunks that are irrelevant in the context of your query, dramatically reducing the time and resources needed to fetch results. Even more—you can enable chunk skipping on non-partitioning columns.
Advanced data analysis with hyperfunctions: Tiger Cloud enables you to efficiently process, aggregate, and analyze significant volumes of data while maintaining high performance.
To top it all, there is no added complexity—you interact with hypertables in the same way as you would with regular Postgres tables. All the optimization magic happens behind the scenes.
Note
Inheritance is not supported for hypertables and may lead to unexpected behavior.
For more information about using hypertables, including chunk size partitioning, see the hypertable section.
To create a hypertable for your time-series data, use CREATE TABLE.
For efficient queries on data in the columnstore, remember to segmentby the column you will
use most often to filter your data. For example:
CREATE TABLE conditions (time TIMESTAMPTZ NOT NULL,location TEXT NOT NULL,device TEXT NOT NULL,temperature DOUBLE PRECISION NULL,humidity DOUBLE PRECISION NULL) WITH (tsdb.hypertable,tsdb.segmentby = 'device',tsdb.orderby = 'time DESC');
When you create a hypertable using CREATE TABLE ... WITH ..., the default partitioning
column is automatically the first column with a timestamp data type. Also, TimescaleDB creates a
columnstore policy that automatically converts your data to the columnstore, after an interval equal to the value of the chunk_interval, defined through compress_after in the policy. This columnar format enables fast scanning and
aggregation, optimizing performance for analytical workloads while also saving significant storage space. In the
columnstore conversion, hypertable chunks are compressed by up to 98%, and organized for efficient, large-scale queries.
You can customize this policy later using alter_job. However, to change after or
created_before, the compression settings, or the hypertable the policy is acting on, you must
remove the columnstore policy and add a new one.
You can also manually convert chunks in a hypertable to the columnstore.
Note
For TimescaleDB v2.23.0 and higher, the table is automatically partitioned on the first column
in the table with a timestamp data type. If multiple columns are suitable candidates as a partitioning column,
TimescaleDB throws an error and asks for an explicit definition. For earlier versions, set
partition_column to a
time column.
If you are self-hosting TimescaleDB v2.20.0 to v2.22.1
, to convert your
data to the columnstore after a specific time interval, you have to call [add_columnstore_policy] after you call
CREATE TABLE
If you are self-hosting TimescaleDB v2.19.3 and below, create a Postgres relational table
,
then convert it using create_hypertable. You then enable hypercore with a call
to ALTER TABLE.
Keywords
Found an issue on this page?Report an issue or Edit this page
in GitHub.